bueno amigos. con este metodo que les voy a dejar. podran descargar lo que se encuentre en internet a super velocidades. usando un vps.
para los que ya tienen un vps. pues esto les podria resultar muy util. los vps. tienen velocidades impresionantes de descarga y de subida. y eso lo podemos aprovechar.
por ejemplo en mi caso lo que hago es bajar peliculas de torrent. y luego las subo a vk.com para poder verlas en linea cuando quiera. primero las descargo y luego las subo.
el promedio que se tarda una pelicula ya descargada en el vps de subida es de 15 a 20 minutos. dependiendo del tamanño.
bueno para poder hacer esto tenemos que ingresar al vps algo similar a como se entra a cualquier sistema operativo usando virtualbox. (buscar en internet sobre virtualbox) para eso aqiu les voy a dejar un tutorial de como hacer . eso si tienen que saber un poco ingles para poder realizar este tuto. si no entienden algo dejen sus comentario es esta entrada.
TUTORIAL
Do you want a graphical environment (GUI desktop) on your VPS server, just like on your computer at home or at work? This can be done!
This tutorial is just about how to install a graphical environment (GUI) on Linux VPS server and VNC server to let you connect to your VPS GUI desktop from your computer and to use VPS server as a desktop computer, run Firefox, Openoffice and other programs. Also, you may check our other tutorial about very good Gnome Desktop alternative LXDE which is more suitable for a low RAM configurations
This tutorial is just about how to install a graphical environment (GUI) on Linux VPS server and VNC server to let you connect to your VPS GUI desktop from your computer and to use VPS server as a desktop computer, run Firefox, Openoffice and other programs. Also, you may check our other tutorial about very good Gnome Desktop alternative LXDE which is more suitable for a low RAM configurations

For GUI desktop installation we choose minimal Ubuntu 10.04 or Ubuntu 10.10 OS version.
Since Gnome XWindows GUI will use alot of RAM,
Since Gnome XWindows GUI will use alot of RAM,
Reinstall your VPS with minimal Ubuntu OS and log in to your VPS server ssh command line as “root”.
1) Preparation of empty VPS server for GUI installation:
Uninstall and remove all unnecessary services (if really not needed):
root@server:~# apt-get purge apache2* bind9* samba*
Update existing packages:
root@server:~# apt-get update
root@server:~# apt-get upgrade
Install text editor “nano”:
root@server:~# apt-get install nano
2) GUI desktop installation:
root@server:~# apt-get install ubuntu-desktop
Choose console country from the list, for example.: USA
Select keyboard layout, for example.: USA
If asked, choose optional keyboard shortcut to switch keyboard languages, for example.: Alt + Shift
Choose console charset, for example.: UTF-8
Choose console font: .Combined – Latin; Slavic Cyrillic, Hebrew, basic Arabic
3) Configuring Gnome and XWindows
root@server:~# /etc/init.d/gdm startroot@server:~# dpkg-reconfigure xserver-xorg
4) Install Remote Desktop Server (RDS), we use TightVNC for Linux:
root@server:~# apt-get install tightvncserver
5) Configure RDS VNC server, and create VNC connection password.
This command starts server and asks you for a password. Important! This password will be used to connect to your VPS server GUI desktop, so use a secure and strong password (but not longer than 8 characters).
Also, if you want you can create additional, limited privileges connection password (read only password), with this read only password it is possible to connect to desktop, but can not do anything, just view.
If you want to create an additional read only password then for a question:
root@server:~# vncpasswdThis command starts server and asks you for a password. Important! This password will be used to connect to your VPS server GUI desktop, so use a secure and strong password (but not longer than 8 characters).
Also, if you want you can create additional, limited privileges connection password (read only password), with this read only password it is possible to connect to desktop, but can not do anything, just view.
If you want to create an additional read only password then for a question:
Would you like to enter a view-only password (y / n)
Answer … Y(es), and enter another password.
If the additional read only password you do not want, then respond, N.
If the additional read only password you do not want, then respond, N.
root@server:~# vncserver :1 -geometry 1024x768 -depth 16 -pixelformat rgb565
6) Check whether the VNC server is running with the command:
root@server:~# ps aux | grep Xtightvnc
Xtightvnc process must be shown:
Xtightvnc: 1-desktop X-auth …
This means that the VNC server is running.
7) By default, the VNC server does not use the Gnome window manager. To make VNC server to use Gnome window manager by default, you should make some changes to the configuration files:
root@server:~# nano ~/.vnc/xstartup
If you find uncommented, then comment-out with the character # line with:
And in the end of the file add a new line:
After changes files might look like this:
#x-window-manager &And in the end of the file add a new line:
gnome-session &After changes files might look like this:
#!/bin/shxrdb $HOME/.Xresources
xsetroot -solid grey
#x-terminal-emulator -geometry 80x24+10+10 -ls -title "$VNCDESKTOP Desktop" &
#x-window-manager &
# Fix to make GNOME work
export XKL_XMODMAP_DISABLE=1
/etc/X11/Xsession
gnome-session &
8 ) Important! Run this command before restarting your VPS server, to make sure SSHD service will run automatically when your VPS server starts:
9) Restart VPS server (to see that everything is working fine)
10) Connect to your VPS server on the SSH console after reboot and start VNC server:
root@server:~# update-rc.d ssh defaults9) Restart VPS server (to see that everything is working fine)
root@server:~# reboot10) Connect to your VPS server on the SSH console after reboot and start VNC server:
root@server:~# vncserver :1 -geometry 1024x768 -depth 16 -pixelformat rgb565
If, after updating and upgrading packages you can not connect to your VPS server via SSH, this means that sshd service is not started. In this case, connect to our VPS server control panel on:
On control panel select your VPS server from the list, connect to your server via Java SSH console and start sshd service manually:
root@server:~# /etc/init.d/ssh start
After that set configuration on your VPS server to launch SSHD automatically when server starts:
root@server:~# update-rc.d ssh defaults
11) Download and install VNC program on your computer from here:
11) Run VNC program on your computer:
Enter in the VNC program address bar IP address of your VPS server and the end of address add a colon : with number 1 (as in this example, we launched VNC server, with the number 1), for example.:
Enter in the VNC program address bar IP address of your VPS server and the end of address add a colon : with number 1 (as in this example, we launched VNC server, with the number 1), for example.:
192.168.0.1:1
Press “Connect” button and enter VNC password you have set before:

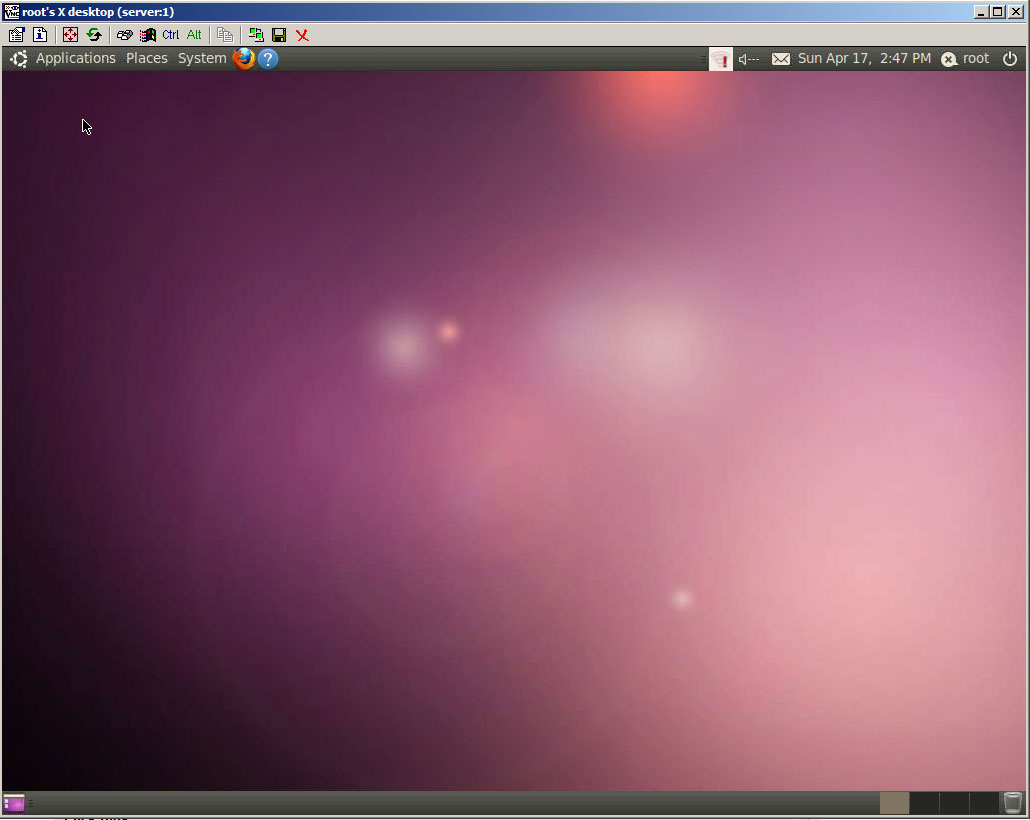
TA-DA! You have connected to your VPS server GUI desktop
- clic aqui para ir al tuto originaL
- clic aqui para ver otro tuto para vps con poca memoria ram. si es el caso de alguno de uds
si su vps tiene poca ram utilizar el tuto 2.
pero si su vps tienen suficiente ram entonces usen el tuto que esta aqui. o el tuto 1 ya que es el mismo.
posibles soluciones a los problemas que encuentren uno de ellos podria ser a la hora de ejecutar este comando apt-get install ubuntu-desktop
ResponderEliminaratraves del putty les podria tirar este mjs de error
"E: dpkg was interrupted, you must manually run 'sudo dpkg --configure -a' to correct the problem."
la solucion para ejecutar este problema es ejecutar este comando
sudo dpkg --configure -a y si necesitan mas informacion aqui les dejo el enlace donde podran encontrar mas ayuda en caso lo necesiten
http://adf.ly/FQmdE
si les siguen dando problemas para llevar el tuto puede ejecutar sl sigueinte comando. para que procedan con el tuto
ResponderEliminarDo:
sudo apt-get install gdm
Then try again etc/init.d/gdm start
la info de sque de aqui http://adf.ly/FQnIK
si este tuto no les funciona prueben con este http://rbgeek.wordpress.com/2012/06/25/how-to-install-vnc-server-on-ubuntu-server-12-04/
ResponderEliminarHey there! I know this is sort of off-topic but I had to ask.
ResponderEliminarDoes building a well-established website like yours require a massive amount work?
I am completely new to running a blog but I do write in my journal on a daily basis.
I'd like to start a blog so I can easily share my personal experience and views online. Please let me know if you have any suggestions or tips for brand new aspiring blog owners. Thankyou!
Also visit my homepage : aaa width Women clogs